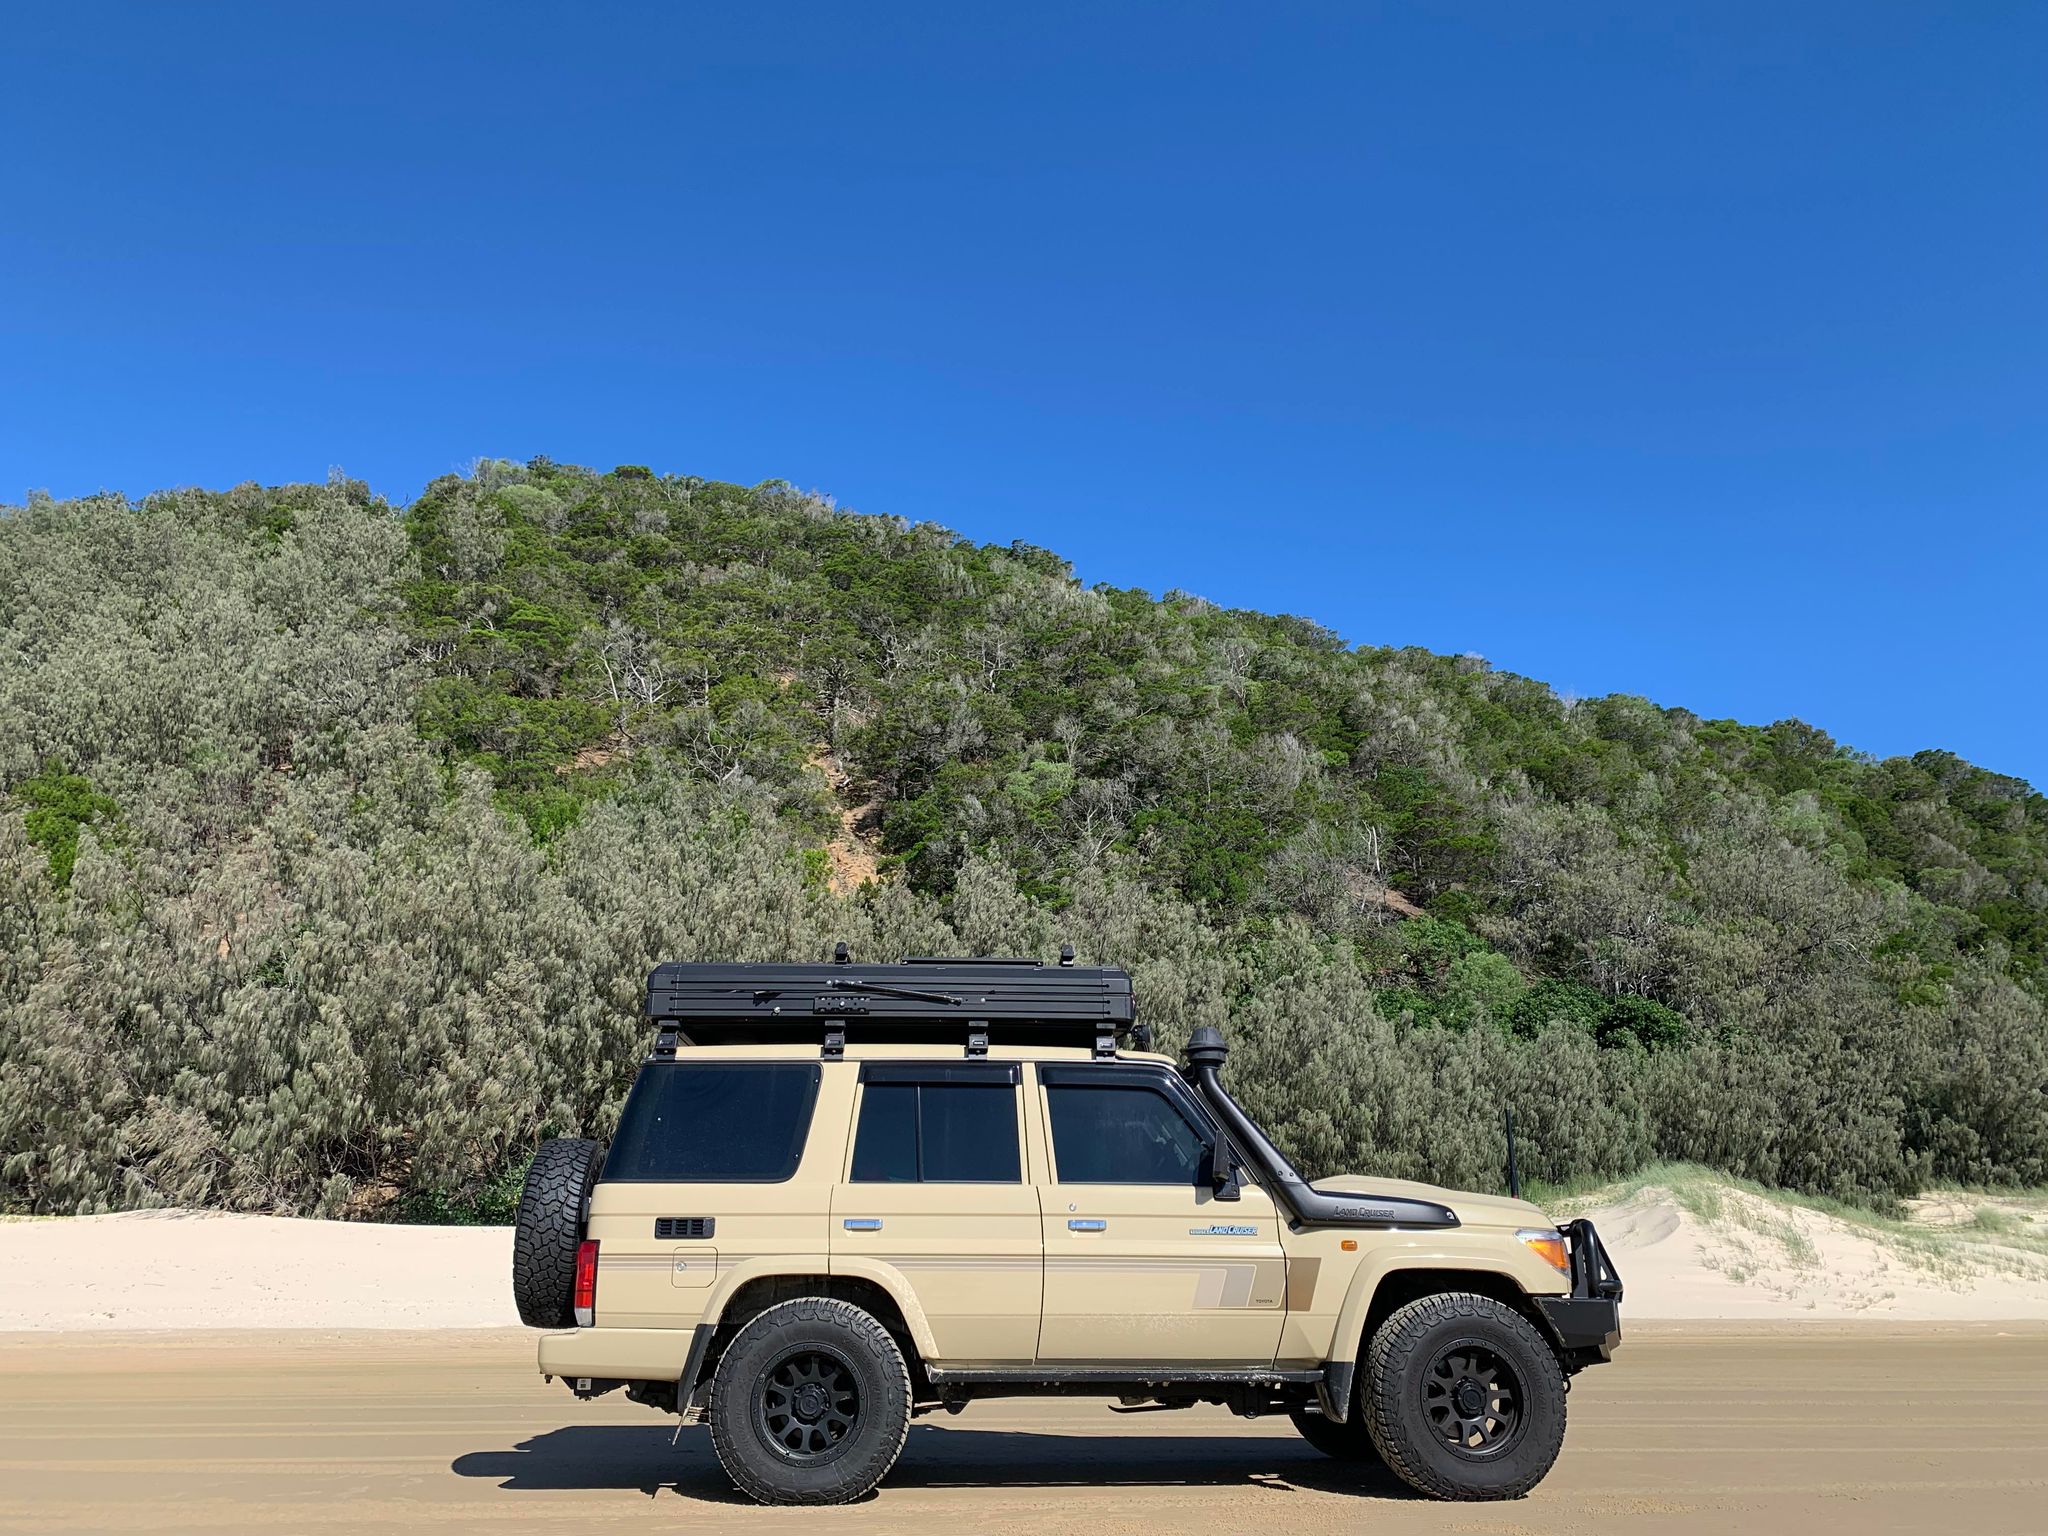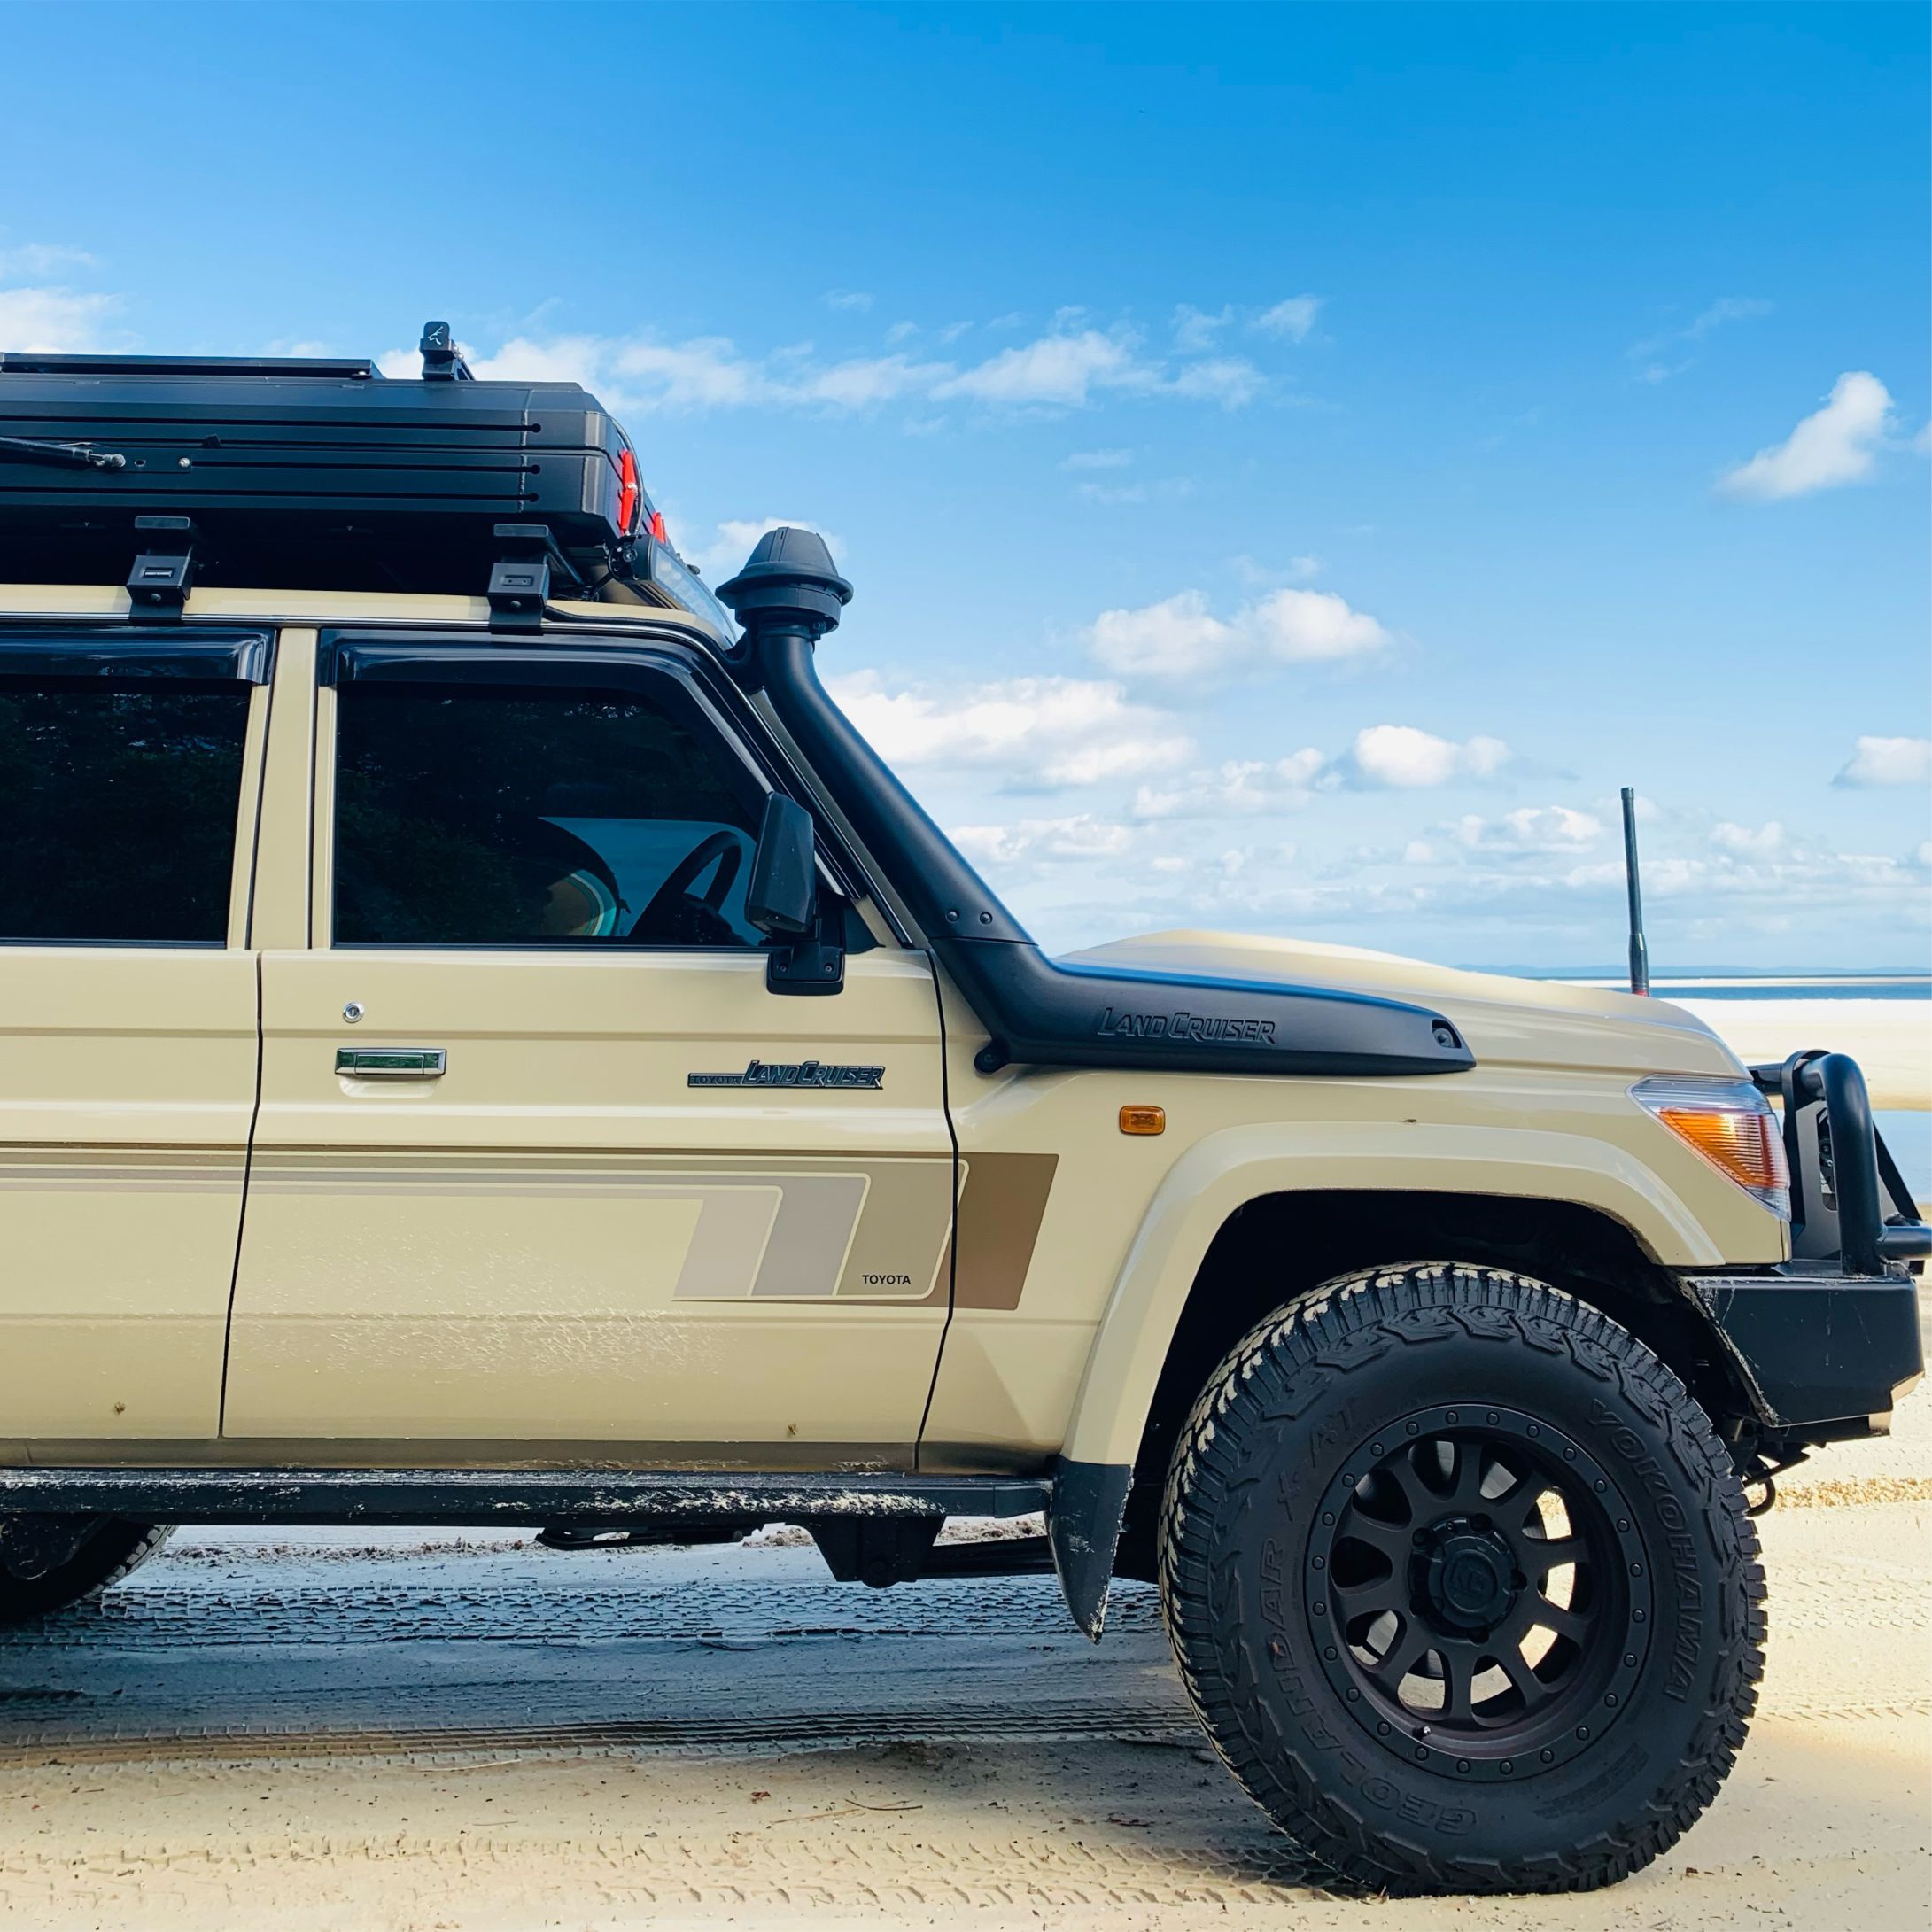
Automotive graphics kits.
Best Seller // Classic 70 series stripe kit

Classic Landcruiser 70 Series Stripe kit

Customise your adventure rig.
Why choose us?
-
Perfect Apply
Our graphics are printed on perfect apply media, this means the adhesive has an air release backing making installation easy and bubble free.
-
UV Rated for Australia
Our graphics kits come with a full gloss or matte UV lamination that is made to withstand the harsh aussie elements.
-
Aussie made
When purchasing from us, you know all graphics are printed and made in Australia using industry leading products.
Quick Tips
Required Tools
You will require the following tools to install your graphics kit.
- roll of masking tape
- tape measure
- Vinyl applicator (included in kit)
- Methylated spirits and a clean microfiber rag
- Sharp stanley knife of craft knife
- Heat gun (not necessary but recommended).
Prepare your vehicle
We always recommend washing your vehicle the day before installing your graphics, this cleans the surface and also allows time for the door jams to dry. Once dry, clean your vehicle with a clean microfibre towel, gently apply metho to the rag then clean the surface area where the graphics are being installed. make sure you clean around the door edges and remove and grease, grime and contaminants before installing graphics.
Tip: use a tab of the masking tape to test how well the graphics will stick to the paint, if the masking tape does not stick well - you may have a ceramic coating or wash and wax that is preventing the graphics from sticking - remove this before applying graphics.
Pre fit graphics
Your graphics will arrive in a flat pack parcel, this keeps them flat and free of wrinkles. (Always store flat if not installing straight away) Once ready to install we recommend PRE-FITTING your graphics, this requires you to place a small tab of tape at the far left hand side and right hand side of each graphic, install to vehicle and make sure this will fit and the placement is correct. Once you have measured this and it is in the right place. its time to apply a 50/50 masking tape hinge horizontally across the top edge of graphic.
Installation
Basic tips for installation.
- Make sure the vehicle has been washed, and is dry.
- Make sure the vehicle is out of the sun and the surface temperature has cooled to normal room/undercover temperature before installing.
- Pre fit graphics to vehicle, depending on your vehicle model, the graphis may be split up into 2 or 3 pieces - to keep the graphics alligned on the vehicle we recommend taping a 50/50 hinge line horizontally across the top edge of graphics then lifting and removing the backing paper. Using your vinyl applicator gently apply pressure moving in right across the tape/hinge line and continue to work it downwards with your applicator. The vinyl is printed with perfect apply vinyl, meaning all bubbles will push out if you massage them after removing the application paper. Once the graphic has been applied to vehicle, it is time to remove the application paper, this is a low tack transfer paper that is on the front of graphic, be careful that you only remove the transfer paper and dont lift the graphic back off the vehicle.
Once this is complete slide your craft knife fown the recess of the door (do not cut on the paint) then roll the little edges into each side of the door and apply a little bit of heat to these edges to make sure they stick.
Repeat this process, for dual troopy and 76 series models as they are in 2 pieces.
Pro Tip* always pre fit graphics, do not start sticking until they are 100% in the right position, always use the 50/50 hinge method using the masking tape across the horizontal/top edge of the graphics then using the vinyl applicator, slowly work from the top down using the tape as a hinge to slowly work the air our of behind the graphic and apply it evenly - never cut on the vehicles paint, the graphics are designed with a little bit of bleed, so when you trim, usually trim on the opposite door to allow a little 5mm edge that can be rolled around the door recess.
Vinyl Care
Caring for your graphics is easy, the main thing is to always wash after beach use using a general wash and wax and a sponge. never pressure spray the graphics up close as this can damage the UV covering.
Always remove bird poop and tree sap ASAP as these are acidic and can cause the vinyl to peel, shrink or stain.


